Wood stains are a great way to add your desired pigments to a workpiece. However, there are times when you’ll experience wood not taking stain evenly. As a result, you’ll end up with a blotchy finish, which could be frustrating, especially for large projects. To help solve the problem, I listed here some reasons why stains don’t take in evenly and what you can do about it.
Take note that stain products aren’t made equal. You have to consider this factor together with the aspects I discussed below. It may take a few trial and error sessions to find the best solution to your stain problem.
Reasons why wood won’t take stains evenly
Wood materials are like stiff sponges. It has small pores where stains are absorbed at varying levels. But if the wood piece has varying densities on different spots, it would cause blotchiness. Such blotchiness will cause uneven stain absorption. It means that one spot on the wood takes in more stain while others take less.
For beginner woodworkers, uneven staining can be a big problem. It might mean redoing the finish or losing the project entirely. It’s a very common problem but tricky to address since each wood type has varying stain absorption levels.
Take note that the likes of birch, maple, alder, pine, and cherry are more likely to blotch than other wood types. Extra care is needed to control stain penetration on these wood types for you to achieve even coats.
How to fix wood that won’t take stains evenly
If you’re dealing with an uneven stain job, here are some of the steps you can take:
Step 1. Strip off the uneven stain
The very first thing you need to do to fix an uneven stain is to remove it from the wood. For this, you have two options: remove the stain by sanding or by a chemical strip.
Sanding is the most common option since it’s more convenient and won’t damage the wood. I suggest using 320-grit sandpaper to remove the old stain without making the wood rough. Always sand lightly, so you only remove the stain layer and not make the wood surface uneven.
On the other hand, you can also consider a chemical strip. With this method, you simply apply a stain stripper on top of the uneven coat. You’ll let the chemical dry before scraping it off together with the stain. This works, but many woodworkers prefer to stick to sanding since it gives them more control.
Unfortunately, the only way to fix an uneven stain is to remove it. As much as you can try applying a new coat, you’ll just hide it. This technique won’t fix the problem and would likely create more issues on the wood.
Step 2. Apply a coating of dewaxed shellac
Once you’re done removing the uneven stain, the next step is to apply a wash coat of dewaxed shellac on wood. Keep it thin so that the wood won’t look too glossy and allow the stain to penetrate well later on.
Make sure that you vacuum clean the wood dust first to prevent it from sticking into the shellac coating.
Unlike waxed shellac, dewaxed types are clearer and will create a barrier on the wood. This will seal off the wood while leveling the varying densities of the wood surface. It will lead to a more even stain finish.
You can also use waxed shellac, but the result is slightly cloudier than the dewaxed version. Just note that waxed shellac isn’t compatible with oil-based polyurethanes and water-based finishes.
On the other hand, you can also try using wood conditioners. As with shellac, you should only apply a thin layer.
Step 3. Re-apply your stain
Once your wash coat is dry, you can re-apply your choice of stain to the wood. By this time, you’ll notice a more even stain finish than before you perform the first steps.
However, if you’re afraid that the wood will still have an uneven stain, you can switch to gel stains. Unlike traditional stain products, gel stain suspends its pigments on the wood surface. This prevents oversaturation of the stain in the wood pores. In short, your finish would be more even.
But before you make the jump to gel stains, you should know that this finish creates deeper contrasts to specific wood types. For example, gel stains will give a higher contrast on earlywood pine.
When applying gel stains, make sure that you wipe the excess so that it won’t pool on some spots of the wood.
Step 4. Let it dry
After applying the gel stain, you should let it dry thoroughly based on the manufacturer’s recommended duration. Most gel stains take 8 to 24 hours to dry, which is pretty similar to standard finishes.
Also, you should wait around three minutes before wiping off the excess stain to ensure that it has settled into the wood grains properly. Wiping too early may deprive the wood of the stain, which will lead to blotchiness.
Step 5. Apply more coats
Once your initial coating is dry, you can re-apply more. Make sure that you let the stain dry between each coat for the best results.
For a better finish, I usually sand between each coat. A 220-grit sandpaper will do the job here or extra-fine steel wool. Always sand on top of each coat as lightly as you can. The goal is to remove uneven surfaces and not puncture through the stain layer you just made.
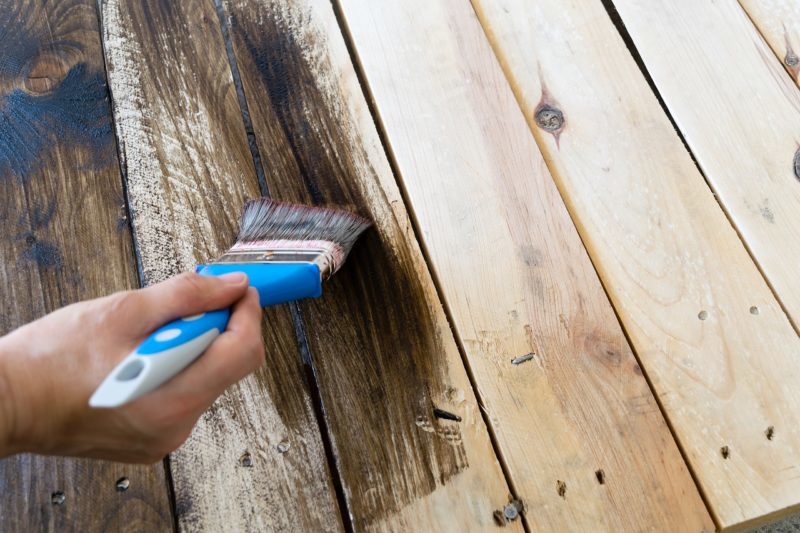
Additional tip: choose the right brush for staining!
Your choice of a brush while staining will largely affect the evenness of the finish. If you’re using an oil-based finish, it’s best to use a natural bristle brush. This brush has fine bristles that hold more stains than its synthetic counterparts.
On the other hand, water-based stains are best applied using synthetic brushes to prevent the bristles from losing their stiffness.
Also, the right choice of brush will ensure an even finish. It’s important to keep this in mind to prevent a problematic stain job.
What if it’s too late to fix uneven stains?
If you’ve stained your entire project and it turned out blotchy, it might be too late to strip the coating off. In this case, the best move is to hide the uneven finish.
You can use a glaze to hide light blotching. To do this, you need to apply a sealer coat on top of your stain finish.
Next, you need to roughen the surface of the sealer once it dries using extra-fine steel wool. This is to give the glaze enough hold on the surface. Once it’s done, you can apply a gel stain as your glaze, preferably an oil-based type.
This can fix light to moderate blotching. However, if the uneven stain is extremely obvious, you’re better off redoing the finish.
How to prevent uneven stains on wood
Preventing blotchy stains can be tricky since each wood type has its own grain density and stain absorption level. For the likes of poplar, pine, maple, and cherry, its spongy areas tend to absorb more stains than denser areas.
To prevent this from happening, you can start by sanding the face grain using 180-grit sandpaper. For the end grain, you should sand using a 220-grit.
Next, you should wipe off any dust and dirt before applying a wash coat. This should reduce or prevent uneven stains across all wood types. But just like in any staining technique, you must try this on a spare piece of wood first.
How do you fix blotchy wood after stripping?
After stripping, you can fix blotchy wood by applying a gel stain. You should also sand the wood before applying any coat to remove uneven surfaces and previous stains. It should also remove dark spots that will make the stain look blotchy.
Will a second coat of stain darken wood?
The second coat of stain will usually darken the wood as you’re technically applying more pigments. A higher number of coatings mean a darker finish.
The rule of thumb is that you should apply at least two to three layers of stain for the best wood protection.
How long should a stain sit before wiping off?
After applying stain to wood, you should wait for at least five to 10 minutes before wiping the excess. This will give the stain product enough time to penetrate the wood pores.
Wiping earlier than this period will result in a lighter tone. In some cases, the stain will look blotchy as spongier parts of wood absorb stains faster.
Conclusion
A wood not taking stain evenly is a nightmare for every woodworker. But if you know how to fix it, you can save your project from doom. This is crucial if you’re accepting large woodwork projects for your clients.
Make sure that you try new methods on a spare wood piece first. You should also plan the stain application to avoid problems like this.
Do you have added staining tips to share? Let us know below!